This is how to set up a rig for resting elbows(or knees) on a surface while moving the hands and/or body, without shortening and/or lengthening the upper and lower arms (or legs).
It’s much simpler than it might seem. Spend a bit of time early to save a lot of time time later counter-animating elbows or knees.
Thanks to Katrín for demonstrating the need for this, and to Max for inspiring the solution and proving it works. Here's Max's proof of concept: https://vimeo.com/204762414
1.
Create > Locator
to Create Locator1.
2.
Create > Locator (again)
to Create Locator2.
3.
Select Locator1, then Locator2.
Keyboard command Ctrl + p to Parent Locator2 under Locator1.
4.
Make sure rig's joint's are visible.
5.
Select Elbow Pole Vector control, then Locator1.
Constrain > Parent
to Parent Constrain rig's Elbow Pole Vector control under Locator1.
6.
With ‘Snap to points’ turned on (hold v on keyboard), translate/snap Locator1 to Elbow Joint.
7.
With ‘Snap to points’ turned on (again hold v on keyboard), translate/snap Locator2 to Wrist IK joint.
8.
Turn On Elbow Pole Vector's Elbow Snap in the Channel Box.
9.
Optionally, instead of snapping Locator2 to the Wrist joint, Parent Constrain Locator2 under the Wrist joint.
Select Locator2, then Wrist joint.
Constrain > Parent
Then Delete History and Freeze Transforms of Locator 2. This will make Locator2's default relationship to Locator1 have Translates and Rotates of 0. Make sure the Parent Constraint from Locator2 under the Wrist IK control is deleted as well.
10.
Select Wrist IK control, then Locator2.
Constrain > Parent
to Parent Constrain Wrist IK control under Locator2. This is the opposite of the temporary Parent Constraint in the optional step, and should be done regardless of doing or not doing the optional step.
11.
Select Elbow joint and Shoulder joint to assign Distance Tool to measure their distance.
Create > Measure Tools > Distance Tool
12.
To 'translate' Wrist IK control, rotate Locator1. This will move Locator2 and the Wrist IK control. Set keys on Locator1 for this, not Locator2 or the Wrist IK control.
13.
To rotate the Wrist IK control, rotate Locator2. Set keys on Locator2, not the Wrist IK control.
14.
If/when you need to move any part of the body that affects the location of the Shoulder joint, refer to the Distance Tool’s measurement to minimize the variation in distance from Shoulder to Elbow. For example, the character is sitting in a chair, resting their elbow on a table. If you move the COG control (Center Of Gravity) up, this increases the distance from the shoulder to the elbow. You can counter animate the upper body and shoulder controls to tilt back toward the elbow to decrease that distance.

2017/02/19


2015/06/04
Animation Mentor Animals and Creatures Masterclass
Introduction to Animal and Creature Animation
Term: Fall 2012
Mentor: Alison Sanders
http://www.imdb.com/name/nm2770321/
Advanced Creature Production
Term: Winter 2013
Mentor: Jean-Denis Haas
http://www.imdb.com/name/nm1940902/
http://www.jeandenis.net/
Class 1 Section 1
Life Sketches
 Cat Poses
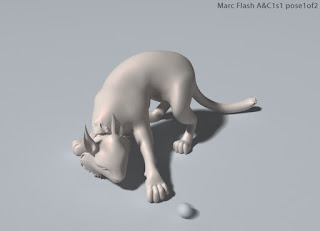
 Class 1 Section 2
Cat Vanilla Walk Planning Sketch
 Class 1 Section 3
Cat Pounce Planning Sketch
 Class 1 Section 7
Ogre Outburst Planning Sketch
 Class 2 Section 1
Dragon Flight Cycle Planning Sketch
 Class 2 Section 2
Dragon Plate Planning Sketch
 Class 2 Section 6
Ogre Versus Dragon Fight Planning Sketch

Term: Fall 2012
Mentor: Alison Sanders
http://www.imdb.com/name/nm2770321/
Advanced Creature Production
Term: Winter 2013
Mentor: Jean-Denis Haas
http://www.imdb.com/name/nm1940902/
http://www.jeandenis.net/
Class 1 Section 1
Life Sketches


Cat Vanilla Walk Planning Sketch

Cat Pounce Planning Sketch

Ogre Outburst Planning Sketch

Dragon Flight Cycle Planning Sketch

Dragon Plate Planning Sketch

Ogre Versus Dragon Fight Planning Sketch

Animation Mentor Class 6 Polishing And Portfolio
This class was all about the final 10% of animating (which can be 90% of the work). Some new work was done, bust most of the time was put into polishing animations done in previous classes.
Term: Summer 2012
Mentor: Greg Whittaker
http://www.imdb.com/name/nm1061410/
https://vimeo.com/user28776328
Sections 1 & 2
We selected the best of our previous work and began polishing the most promising scene.
Section 3
While continuing to polish previous work, pre-production for multiple new scenes begins. One of the planned scenes is selected to produce.
Sections 4-8
While continuing to polish previous work, animation on the chosen new scene begins and continues for the next few weeks.
Section 9-11
We continued to polish our work, and arranged our demoreels. This included designing title cards and DVD case covers.
Section 12
We had completed the Character Animation Program, and possesed a demoreel with which to seek employment. No demoreel is ever complete. It constantly develops to reflect an animator's work. Currently, you can find mine featured here on this blog. You can also check out my vimeo for the latest in my animation:
https://vimeo.com/user14114867
Term: Summer 2012
Mentor: Greg Whittaker
http://www.imdb.com/name/nm1061410/
https://vimeo.com/user28776328
Sections 1 & 2
We selected the best of our previous work and began polishing the most promising scene.
Section 3
While continuing to polish previous work, pre-production for multiple new scenes begins. One of the planned scenes is selected to produce.
Sections 4-8
While continuing to polish previous work, animation on the chosen new scene begins and continues for the next few weeks.
Section 9-11
We continued to polish our work, and arranged our demoreels. This included designing title cards and DVD case covers.
Section 12
We had completed the Character Animation Program, and possesed a demoreel with which to seek employment. No demoreel is ever complete. It constantly develops to reflect an animator's work. Currently, you can find mine featured here on this blog. You can also check out my vimeo for the latest in my animation:
https://vimeo.com/user14114867
2012/06/21
Animation Mentor Class 5 Advanced Acting
This class continued to develop the acting principles of the previous class, and added additional elements like cutting, emotional arcs, acting beats, and interaction.
Term: Spring 2012
Mentor: Peter Kelly
http://www.imdb.com/name/nm1013095/
http://petekellysdoodles.blogspot.com/
Section 1
Lip-sync Planning
The Dialogue shot picked up from where it left off the previous week in Class 4, now with full rig controls so I could animate the face.


Section 2
2 Face Poses


Section 3
2 Face Poses


Section 4
2 Person Dialogue Character Design

Face Pose

Section 5
2 Person Dialogue Planning
This scene gave the opportunity to incorporate cuts between shots as well as more dynamic staging and composition.


Section 6
Face Pose

Section 7
Face Pose

Section 12
Progress Reel
Scenes:
Term: Spring 2012
Mentor: Peter Kelly
http://www.imdb.com/name/nm1013095/
http://petekellysdoodles.blogspot.com/
Section 1
Lip-sync Planning
The Dialogue shot picked up from where it left off the previous week in Class 4, now with full rig controls so I could animate the face.


Section 2
2 Face Poses


Section 3
2 Face Poses


Section 4
2 Person Dialogue Character Design

Face Pose

Section 5
2 Person Dialogue Planning
This scene gave the opportunity to incorporate cuts between shots as well as more dynamic staging and composition.


Section 6
Face Pose

Section 7
Face Pose

Section 12
Progress Reel
Scenes:
- 2 Person Dialogue
- Dialogue, continued from Class 4, now with full rig controls
Animation Mentor Class 4 Introduction to Acting
This class took the ideas form the previous classes, and combined them with behaviours, and details like staging and avoiding clichéd choices.
Term: Winter 2012
Mentor: Ray Chase
http://raymation.blogspot.com/
http://www.imdb.com/name/nm1112186/
Section 1 - 5
Pantomime Planning:


Section 6
Dialogue Planning:


Section 7
Dialogue Character Design
I modified the Bishop rig's body by modeling an altered version, which I applied with a blend shape. Then I used that as a basis for the clothes, which I applied with a wrap deformer.

Section 8
Bishop Hand Pose: Anger

Section 9
Bishop Hand Pose: Relaxed

Section 10 - 11
Bishop Hand Pose: Surprise

Section 12
Progress Reel
Shots:
Term: Winter 2012
Mentor: Ray Chase
http://raymation.blogspot.com/
http://www.imdb.com/name/nm1112186/
Section 1 - 5
Pantomime Planning:
- Safe At Throne
- Fishing Expedition
- Urban Cornucopia


Section 6
Dialogue Planning:
- Woman hears noise and talks to her roommate
- 'Film Noir' Man yells at former colleague
- 'Film Noir' Mobster condescends


Section 7
Dialogue Character Design
I modified the Bishop rig's body by modeling an altered version, which I applied with a blend shape. Then I used that as a basis for the clothes, which I applied with a wrap deformer.

Section 8
Bishop Hand Pose: Anger

Section 9
Bishop Hand Pose: Relaxed

Section 10 - 11
Bishop Hand Pose: Surprise

Section 12
Progress Reel
Shots:
- Dialogue with limited face controls, to be completed with full controls in Class 5
- Pantomime
2012/06/20
Animation Mentor Class 3 Advanced Body Mechanics
This class continued to develop the ideas of the previous class, focused on
biped/humanoid characters.
Term: Fall 2011
Mentor: David Weatherly
http://www.imdb.com/name/nm1316187/
Section 1 - 3
ninJAnitor Planning


Section 4 - 6
Trebuchet Stewie Planning


Section 7 - 11
basketBALLet Planning


Section 12
Progress Reel
Shots:
biped/humanoid characters.
Term: Fall 2011
Mentor: David Weatherly
http://www.imdb.com/name/nm1316187/
Section 1 - 3
ninJAnitor Planning


Section 4 - 6
Trebuchet Stewie Planning


Section 7 - 11
basketBALLet Planning


Section 12
Progress Reel
Shots:
- basketBALLet
- Trebuchet Stewie
- ninJAnitor
2012/06/18
Animation Mentor Class 2 Psychology of Body Mechanics
This class took the basic concepts taught in the previous class and applied them to the mechanics of characters' movement, taking into account variables like physical build, personality, emotion, and environment.
Term: Summer 2011
Mentor: Ethan Hurd
http://www.imdb.com/name/nm0403322/
Section 1 - 3
Backflip Planning
This video contains reference I did myself, parts of a video I found online, and a basic animatic using my thumbnail sketches. I watched many other videos, but the video I found and featured clips from in my Reference can be seen here: Gymnastics : How to Do a Backflip Off of a Wall


Section 4 - 6
Jump On Ball Planning
This video contains a basic animatic using my thumbnail sketches and my personal reference. I also used quite a bit of other video reference, but it's too much to sit through. If you really want to see the sources for that material, here are links to some of it:
Little boy walking on a big ball
Young acrobats street theatre walking globe circus
New Zealands #1 Globe Walker - Circus Aotearoa
New Zealands #1 Globe Walker - Creative Festival '08
Ball Acrobatics
Adam on Acro Ball Jan 2007
Ball Flip Game 2
Adam Menzies 2006
Lunge Balance Ball Exercises


Section 7 - 11
Hand Walk Planning
This video contains a basic animatic from my thumbnail sketches and my personal reference.


Section 12
Progress Reel
Shots:
Term: Summer 2011
Mentor: Ethan Hurd
http://www.imdb.com/name/nm0403322/
Section 1 - 3
Backflip Planning
This video contains reference I did myself, parts of a video I found online, and a basic animatic using my thumbnail sketches. I watched many other videos, but the video I found and featured clips from in my Reference can be seen here: Gymnastics : How to Do a Backflip Off of a Wall


Section 4 - 6
Jump On Ball Planning
This video contains a basic animatic using my thumbnail sketches and my personal reference. I also used quite a bit of other video reference, but it's too much to sit through. If you really want to see the sources for that material, here are links to some of it:
Little boy walking on a big ball
Young acrobats street theatre walking globe circus
New Zealands #1 Globe Walker - Circus Aotearoa
New Zealands #1 Globe Walker - Creative Festival '08
Ball Acrobatics
Adam on Acro Ball Jan 2007
Ball Flip Game 2
Adam Menzies 2006
Lunge Balance Ball Exercises


Section 7 - 11
Hand Walk Planning
This video contains a basic animatic from my thumbnail sketches and my personal reference.


Section 12
Progress Reel
Shots:
- Hand Walk
- Jump On Ball
- Backflip
Subscribe to:
Posts (Atom)